The Ozempic click chart serves as an essential tool for patients learning to administer their diabetes medication accurately through the pen injection system. Each click on the Ozempic pen represents a specific dose measurement, allowing users to dial their prescribed amount with precision. The pen operates through a mechanical clicking system where users rotate the dose selector until reaching their required dosage, with each audible click corresponding to predetermined units. Starting doses typically begin at 0.25 mg weekly for four weeks, progressing to 0.5 mg, and potentially advancing to 1 mg or 2 mg based on individual response and medical guidance.
How the Ozempic Pen Click System Works
The Ozempic pen features a sophisticated yet user-friendly clicking mechanism designed for accurate dose selection. When you turn the dose selector, you’ll hear and feel distinct clicks that correspond to specific dosage increments. The pen displays numbers in the dose window, showing exactly how much medication you’ve selected.
Each pen strength has different click values:
- The 0.25/0.5 mg pen (2 mg/1.5 mL) delivers smaller increments per click
- The 1 mg pen (4 mg/3 mL) provides different click measurements
- The 2 mg pen (8 mg/3 mL) offers the largest dose per rotation
The clicking mechanism prevents accidental overdosing by requiring deliberate rotation of the dose selector. Users must align the dose pointer with their prescribed amount before injection. The pen won’t allow you to select more medication than remains in the cartridge, providing an additional safety feature.
Between each major dose marking, you’ll encounter multiple clicks that represent fractional doses. These intermediate clicks enable fine-tuning of dosages when necessary, particularly useful during dose adjustments or when splitting doses under medical supervision.
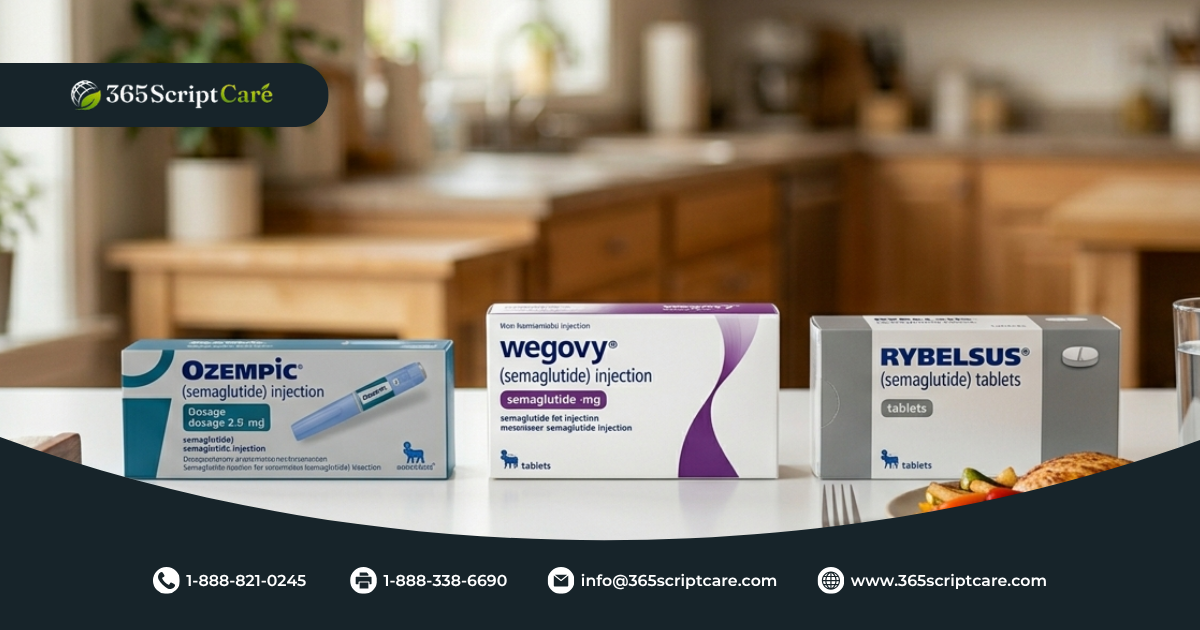
Ready to start your treatment journey? Get Ozempic at competitive prices from Canada through 365 Script Care, a prescription referral service that connects you with licensed pharmacies.
Ozempic Click Chart Dosing Guidelines
The standard Ozempic click chart varies depending on which pen strength you’re prescribed. Each pen concentration requires different click calculations to achieve your target dose. The relationship between clicks and dosage remains consistent within each pen type but differs across pen strengths.
Starting Dose Requirements
| Week | Standard Dose | Pen Type | Number of Clicks |
| 1-4 | 0.25 mg | 0.25/0.5 mg pen | 18 clicks |
| 5-8 | 0.5 mg | 0.25/0.5 mg pen | 36 clicks |
| 9+ | 1 mg | 1 mg pen | 72 clicks |
| Maintenance | 2 mg | 2 mg pen | 72 clicks |
Dose Escalation Schedule
The typical progression follows a methodical increase:
- Weeks 1-4: Begin with 0.25 mg weekly to minimize gastrointestinal effects
- Weeks 5-8: Increase to 0.5 mg if tolerated well
- Week 9 onwards: Consider 1 mg based on glycemic response
- Maximum dose: 2 mg weekly for optimal glucose control
Your healthcare provider determines the appropriate escalation timeline based on your individual response, tolerance, and blood sugar management goals. Some patients achieve excellent control at lower doses, while others require the maximum dosage.
Reading Your Ozempic Pen Correctly

Proper interpretation of the Ozempic click chart ensures accurate dosing every time. The dose window displays numbers that correspond to your selected amount, while the dose pointer indicates the exact measurement. Before each injection, verify that your selected dose matches your prescription.
The pen features clear markings:
- Numbers appear in sequence as you rotate the selector
- Lines between numbers represent intermediate doses
- The dose counter shows remaining medication
- A flow check symbol appears when priming
To read your pen accurately, hold it horizontally at eye level. The dose window should face upward, allowing clear visibility of the selected amount. Ensure proper lighting when setting your dose, as misreading the display could result in incorrect dosing.
Troubleshooting Display Issues
Common reading challenges include:
- Foggy or unclear dose window – wipe clean with a dry cloth
- Numbers not aligning properly – ensure complete rotation to the click stop
- Difficulty seeing small markings – use adequate lighting or magnification
- Dose selector stuck between clicks – gently rotate to the nearest clear position
Calculating Clicks for Different Doses
The Ozempic click chart calculation depends on your prescribed dose and pen concentration. Each pen type has a specific click-to-dose ratio that remains constant throughout its use. Accurate calculation prevents dosing errors and ensures consistent medication delivery.
Click Calculations by Pen Type
0.25/0.5 mg Pen (2 mg/1.5 mL):
- 0.25 mg = 18 clicks from zero
- 0.5 mg = 36 clicks from zero
- Each 0.01 mg = approximately 0.72 clicks
1 mg Pen (4 mg/3 mL):
- 0.5 mg = 36 clicks from zero
- 1 mg = 72 clicks from zero
- Each 0.01 mg = approximately 0.72 clicks
2 mg Pen (8 mg/3 mL):
- 1 mg = 36 clicks from zero
- 2 mg = 72 clicks from zero
- Each 0.01 mg = approximately 0.36 clicks
These calculations help patients who need non-standard doses or are transitioning between pen strengths. Always confirm your click count with your healthcare provider before making dosage adjustments.
Purchase authentic Ozempic through 365 Script Care and save on your diabetes management costs with reliable Canadian pharmacy partners.
Proper Injection Technique Using the Click System
Mastering the injection technique with the Ozempic click chart ensures optimal medication absorption and minimizes discomfort. The process requires attention to detail from dose selection through injection completion. Following the correct sequence prevents medication waste and injection site reactions.
Begin by removing the pen cap and attaching a new needle for each injection. Prime the pen by selecting the flow check symbol and pressing the injection button until a drop appears at the needle tip. This process removes air bubbles and confirms proper pen function.
Step-by-Step Injection Process
- Select your prescribed dose by rotating the dose selector until the correct number appears
- Count the clicks to verify you’ve reached the proper dose
- Clean your chosen injection site with an alcohol swab
- Insert the needle at a 90-degree angle into the skin
- Press and hold the injection button completely
- Count slowly to six while maintaining pressure
- Remove the needle straight out
- Dispose of the needle safely in a sharps container
Injection Site Rotation
Rotate injection sites weekly to prevent lipodystrophy and ensure consistent absorption:
- Abdomen (avoiding 2 inches around the navel)
- Upper thigh (front and outer areas)
- Upper arm (back and outer areas)
- Document each injection location
- Allow sites to rest for several weeks between uses
The clicking mechanism should feel smooth during dose selection. If you encounter resistance or irregular clicking, inspect the pen for damage or expiration. Never force the dose selector, as this could damage the internal mechanism.
Common Dosing Errors and Prevention
Preventing dosing errors with the Ozempic click chart requires vigilance and proper technique. Mistakes often occur during dose selection, calculation, or injection administration. Recognizing potential errors helps maintain consistent blood sugar control and prevents adverse effects.
Frequent Mistakes to Avoid
Miscounting clicks: Double-check your click count against the dose window display. The Ozempic click chart provides exact measurements, but rushing can lead to selection errors. Count deliberately and verify the final number before injection.
Incomplete injection: Failing to hold the injection button for the full six seconds may result in partial dose delivery. The pen requires time to deliver the complete dose through the needle. Watch for the dose counter returning to zero.
Using expired pens: Check expiration dates regularly. Expired medication may lose potency or develop harmful degradation products. Store pens according to temperature requirements to maintain stability.
Incorrect pen strength: Verify you’re using the prescribed pen concentration. Different strengths require different click calculations. Switching between pen types without adjusting click counts causes significant dosing errors.
Prevention Strategies
- Maintain a dosing log with dates, times, and click counts
- Set reminders for injection schedules
- Store pens properly in refrigerator or at room temperature as directed
- Replace needles for each injection
- Inspect pens for damage or crystallization before use
- Keep backup pens available
- Review the Ozempic click chart regularly for reference
Storage and Pen Maintenance
Proper storage and maintenance extend pen life and ensure medication effectiveness. The Ozempic click chart remains accurate only when the pen functions correctly. Environmental factors and handling affect both the medication and delivery mechanism.
Temperature Requirements
Unopened pens require refrigeration between 36°F to 46°F (2°C to 8°C). Never freeze Ozempic pens, as freezing destroys the medication structure. Once opened, pens remain stable at room temperature below 86°F (30°C) for 56 days.
During travel, use insulated cases to maintain appropriate temperatures. Avoid leaving pens in vehicles or direct sunlight. Extreme temperatures affect the clicking mechanism and medication viscosity.
Pen Care Guidelines
| Maintenance Task | Frequency | Purpose |
| Clean pen exterior | Weekly | Prevent contamination |
| Inspect dose window | Before each use | Ensure clear reading |
| Check for leaks | Before each use | Identify pen damage |
| Verify expiration | Monthly | Maintain potency |
| Test clicking mechanism | Before each use | Confirm proper function |
Regular maintenance prevents mechanical failures that could affect dosing accuracy. Clean the pen body with a damp cloth, avoiding harsh chemicals or submersion in water. The dose window requires gentle cleaning to maintain visibility.
Signs of Pen Malfunction
- Irregular or missing clicks during rotation
- Dose window showing incorrect numbers
- Injection button resistance or sticking
- Visible medication leakage
- Cloudy or discolored medication
- Damaged dose selector or pen body
Replace malfunctioning pens immediately. Never attempt repairs or modifications, as these compromise dosing accuracy and sterility.
Buy affordable Ozempic online from Canada through 365 Script Care, your trusted prescription referral service for significant savings on diabetes medications.
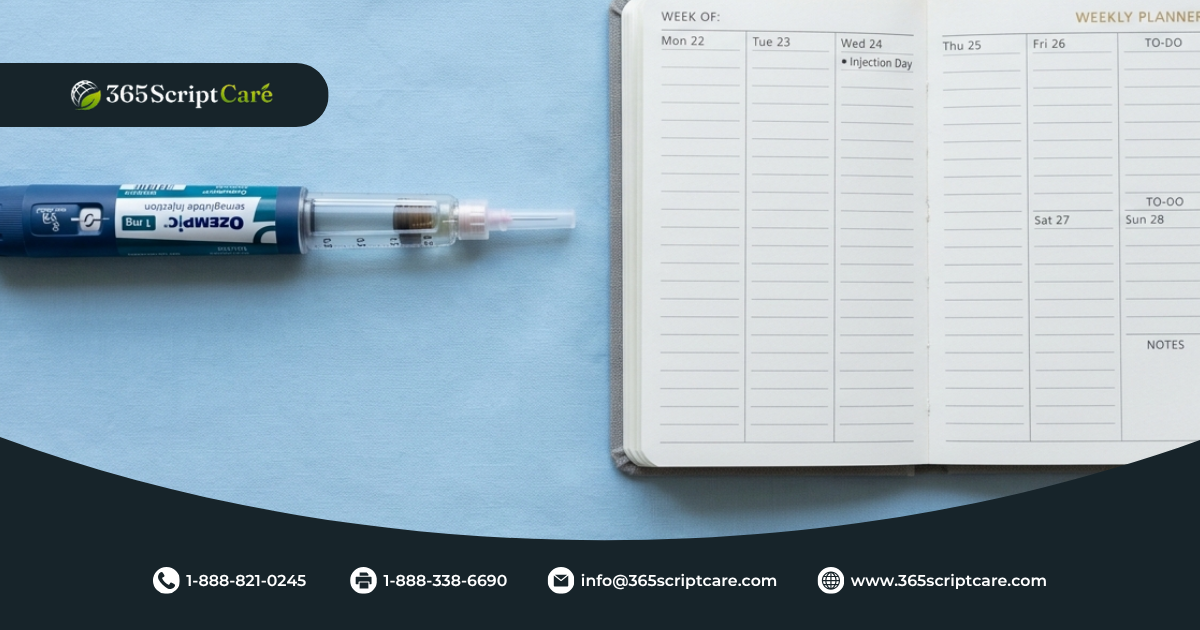
Weekly Dosing Schedule Optimization
Establishing an optimal weekly dosing schedule with the Ozempic click chart promotes medication adherence and stable blood glucose levels. Consistency in timing and technique maximizes therapeutic benefits while minimizing side effects. Your schedule should accommodate lifestyle factors and personal preferences.
Select a specific day and time for weekly injections. Many patients choose weekend mornings when routines are less hectic. The seven-day interval between doses maintains steady medication levels. Missing a dose by more than five days requires schedule adjustment under medical guidance.
Creating Your Dosing Calendar
Develop a systematic approach to tracking injections:
- Mark injection days on a physical or digital calendar
- Set multiple alarms as reminders
- Prepare supplies the night before
- Document each dose immediately after administration
- Note any side effects or concerns
- Track blood glucose responses
Consider factors affecting your schedule:
- Travel plans requiring timezone adjustments
- Special events or holidays
- Medical appointments for monitoring
- Prescription refill timing
- Pen expiration dates
Adjusting for Missed Doses
When doses are delayed, follow these guidelines:
- Within 5 days: Administer as soon as remembered, maintain original schedule
- Beyond 5 days: Skip the missed dose, resume regular schedule
- Never double doses to compensate
- Document any schedule disruptions
- Consult your provider for frequent misses
The Ozempic click chart helps maintain dosing accuracy during schedule adjustments. Count clicks carefully when returning to regular dosing after disruptions.
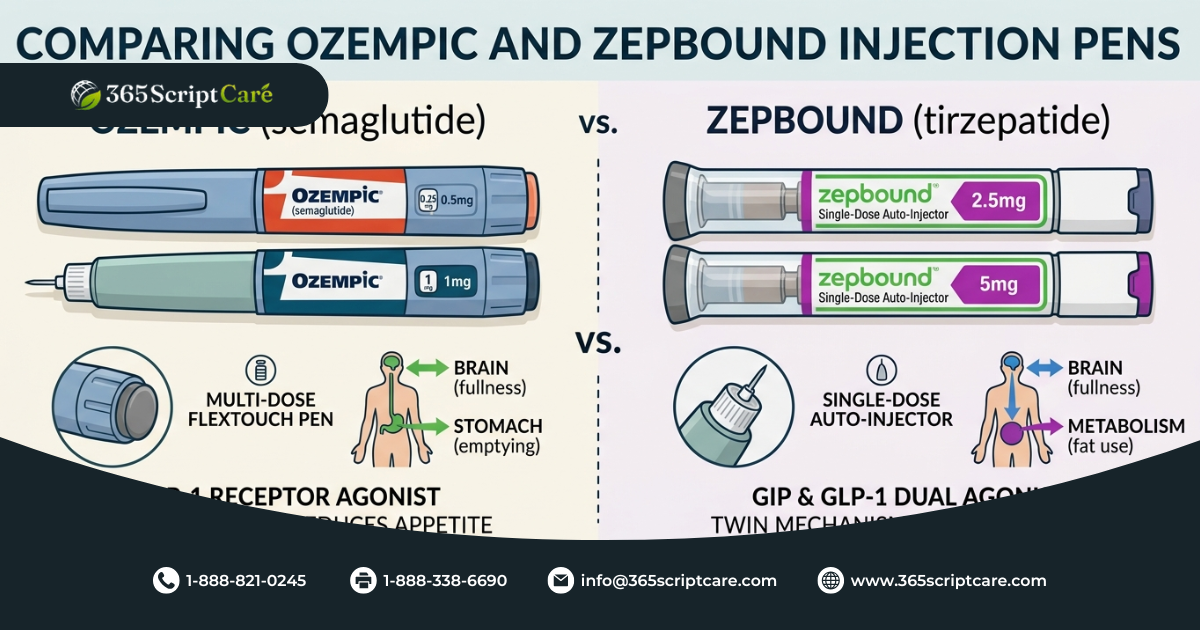
Transitioning Between Pen Strengths
Switching between different Ozempic pen strengths requires careful attention to the click chart differences. Each pen concentration has unique click values, making accurate transition essential for maintaining therapeutic doses. Your provider initiates strength changes based on dose requirements and availability.
Conversion Calculations
When changing pen strengths, recalculate your required clicks:
From 0.25/0.5 mg pen to 1 mg pen:
- Previous: 0.5 mg = 36 clicks
- New: 0.5 mg = 36 clicks (same click count, different pen)
From 1 mg pen to 2 mg pen:
- Previous: 1 mg = 72 clicks
- New: 1 mg = 36 clicks (fewer clicks needed)
Document the transition date and new click requirements. Verify calculations with your healthcare team before initiating the new pen. The Ozempic click chart for each pen strength should be readily accessible during transitions.
Transition Timing Considerations
Plan transitions carefully:
- Complete current pen before switching
- Obtain new prescription in advance
- Review new pen instructions
- Practice dose selection without injecting
- Confirm insurance coverage for new strength
- Schedule follow-up appointments for monitoring
Some patients require multiple pen types simultaneously when doses exceed single pen capacities. This situation demands extra vigilance in selecting the correct pen and calculating appropriate clicks.
Managing Side Effects Through Proper Dosing

Accurate dosing using the Ozempic click chart helps minimize adverse effects while maintaining glycemic control. Side effects often relate to dose size and escalation speed. Proper technique and gradual increases reduce gastrointestinal symptoms commonly experienced during treatment initiation.
Dose-Related Side Effects
Common reactions vary by dose level:
0.25 mg dose:
- Mild nausea
- Decreased appetite
- Minor fatigue
0.5 mg dose:
- Increased nausea frequency
- Occasional vomiting
- Constipation onset
1 mg and higher:
- Persistent gastrointestinal effects
- Significant appetite suppression
- Potential weight loss acceleration
Mitigation Strategies
Reduce side effects through careful management:
- Extend time at lower doses before escalation
- Inject after light meals rather than fasting
- Maintain hydration throughout the day
- Eat smaller, frequent meals
- Avoid high-fat foods near injection time
- Consider anti-nausea medications if needed
The Ozempic click chart enables precise dose adjustments when side effects become problematic. Your provider might recommend temporary dose reductions or slower escalation schedules based on your tolerance.
Track side effects meticulously:
- Record symptom onset and duration
- Note dietary triggers
- Document effective relief measures
- Monitor weight changes
- Report persistent or severe reactions
Monitoring Treatment Response
Regular monitoring ensures the Ozempic click chart dosing achieves therapeutic goals. Treatment response varies individually, requiring periodic assessment and potential dose adjustments. Comprehensive monitoring includes blood glucose tracking, weight measurement, and side effect documentation.
Key Monitoring Parameters
| Parameter | Frequency | Target Range |
| Fasting glucose | Daily initially, then 2-3x weekly | 80-130 mg/dL |
| HbA1c | Every 3 months | Below 7% for most |
| Weight | Weekly | Gradual reduction expected |
| Blood pressure | Monthly | Below 130/80 mmHg |
| Injection site condition | Each injection | No reactions |
Document trends rather than isolated readings. The Ozempic click chart doses correlate with glycemic improvements over time. Initial responses appear within weeks, while maximum effects develop over months.
Response Indicators
Positive treatment signs include:
- Consistent fasting glucose reduction
- Decreased postprandial spikes
- Improved HbA1c values
- Gradual weight loss
- Reduced diabetes medication requirements
- Enhanced energy levels
- Better appetite control
Inadequate response indicators:
- Persistent hyperglycemia despite maximum dosing
- Inability to tolerate side effects
- Allergic reactions or injection site problems
- Weight gain or no weight change
- Worsening glycemic control
Your healthcare team uses monitoring data to optimize the Ozempic click chart dosing for your specific needs. Regular follow-ups ensure appropriate adjustments and identify potential complications early.
Final Thoughts on Mastering Your Ozempic Dosing
Proficiency with the Ozempic click chart transforms diabetes management from a complex challenge into a manageable routine. The clicking system provides precision and consistency, enabling patients to achieve optimal glycemic control while minimizing adverse effects. Through careful attention to technique, storage, and monitoring, users maximize their treatment benefits.
Success requires commitment to proper technique and regular monitoring. The initial learning curve gives way to confident administration as familiarity develops. Patients who master their dosing often experience improved outcomes and greater treatment satisfaction.
Remember that the Ozempic click chart serves as a tool within comprehensive diabetes care. Combine accurate dosing with lifestyle modifications, dietary management, and regular medical supervision. Your healthcare team remains available for guidance and support throughout your treatment journey.
Treatment individualization remains paramount. While standard protocols provide frameworks, your specific needs determine optimal dosing strategies. Regular communication with providers ensures adjustments align with your evolving health status and goals.
The investment in learning proper technique pays dividends through improved health outcomes. Each correctly administered dose contributes to better glucose control, potential weight loss, and reduced diabetes complications. Your dedication to mastering the click system directly impacts treatment success.
Continue educating yourself about diabetes management beyond medication administration. Stay informed about new developments, management strategies, and support resources. Knowledge empowers better decision-making and improved health outcomes.
Frequently Asked Questions
How Many Clicks of 1mg Ozempic Is 0.5 mg?
With the 1 mg Ozempic pen, achieving a 0.5 mg dose requires 36 clicks from the zero position. The Ozempic click chart for the 1 mg pen calculates at approximately 72 clicks for the full 1 mg dose, making half that amount equal to 36 clicks. Always verify your count by checking the dose window display, which should show 0.5 when properly selected. This calculation remains consistent across all 1 mg pens regardless of remaining medication volume.
How to Inject Ozempic With Clicks?
Injecting with the Ozempic click chart system involves rotating the dose selector until reaching your prescribed number of clicks, confirming the dose in the window, then proceeding with injection. Turn the selector clockwise while counting each audible click until your target dose appears. After dose selection, clean your injection site, insert the needle at 90 degrees, press the injection button completely, and hold for six seconds while the medication delivers. The clicks ensure accurate dosing, but proper injection technique ensures complete medication delivery.
How Many Clicks Is 0.25 on a 0.5 Pen?
The 0.25 mg dose on a 0.25/0.5 mg pen requires 18 clicks from zero according to the standard Ozempic click chart. This pen concentration delivers approximately 0.014 mg per click, making 18 clicks equal to 0.25 mg. The dose window will display 0.25 when correctly selected. This starting dose helps minimize side effects during treatment initiation while establishing tolerance to the medication.
How Many Clicks to Microdose Ozempic?
Microdosing Ozempic involves using fewer clicks than standard starting doses, typically ranging from 6-12 clicks depending on the pen strength and desired dose. The Ozempic click chart allows for precise small doses, though this practice requires medical supervision.